A contract, of course, is an agreement between a vendor and a buyer. A contract is known as an “Outline Agreement” in SAP terms.
The vendor agrees to provide certain goods/products to the buyer during the agreed period and for the agreed terms. On the other hand, the buyer is also responsible to purchase the agreed-upon quantities under the terms and conditions specified in the outline agreement.
In this article, we will outline the steps you will need to follow when creating a contract or outline agreement in SAP. We will also learn how to navigate to an existing outline agreement.
Steps for creating an outline agreement/contract in SAP
Step 1: Navigate to the agreement creation screen. The T-code for outline agreement creation is ME31K.
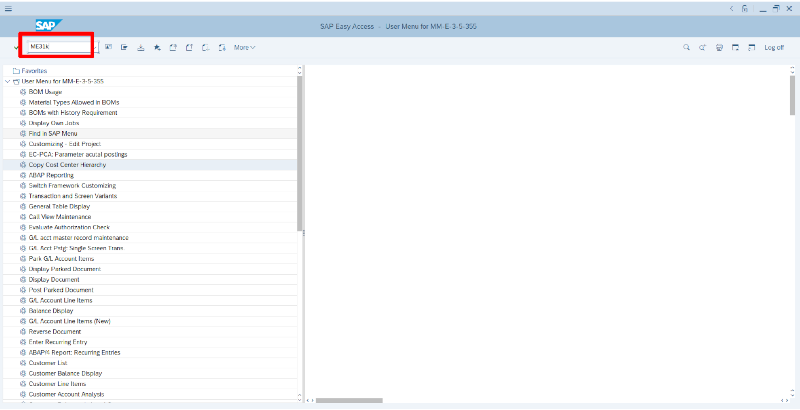
You can also go to the outline agreement creation screen by following the below path:
Logistics >>> Material Management >>> Purchasing >>> Outline Agreement >>> Contract >>> Create
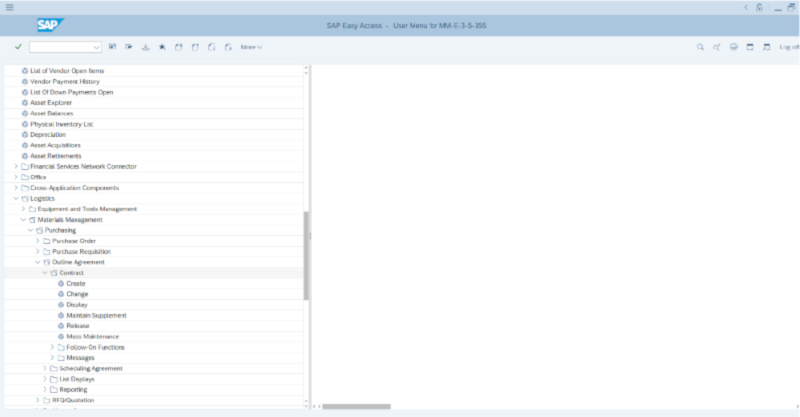
This will take you to the initial screen for contract creation.
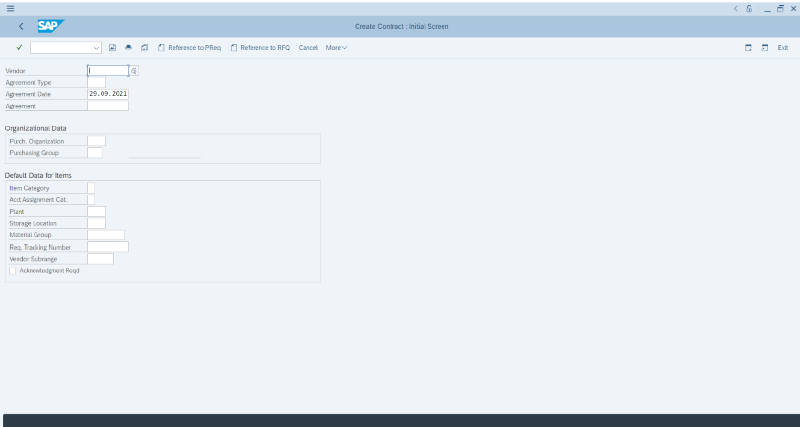
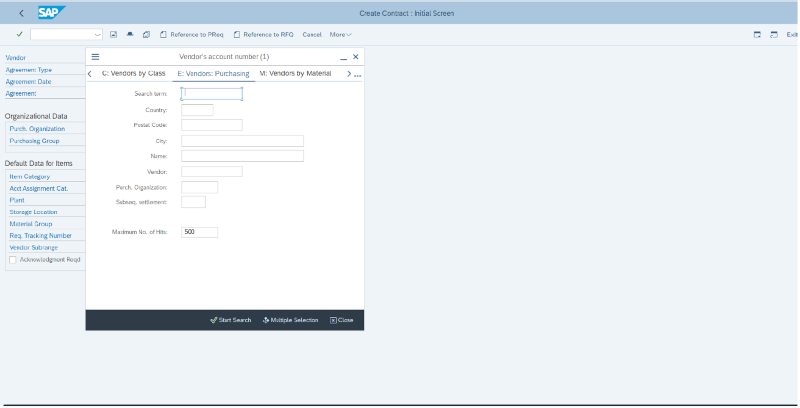
Step 2 - Vendor: You need to enter the vendor code in this field or click on the search icon and search for the desired vendor.
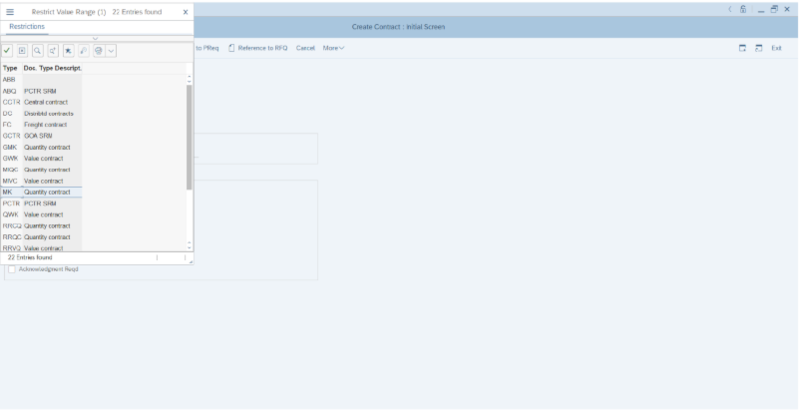
Step 3 - Agreement Type: Select the agreement type. We have selected the quantity contract MK here for our example.
Step 4: Enter Purchasing Org and Purchasing Group to enter in the main screen of the contract.
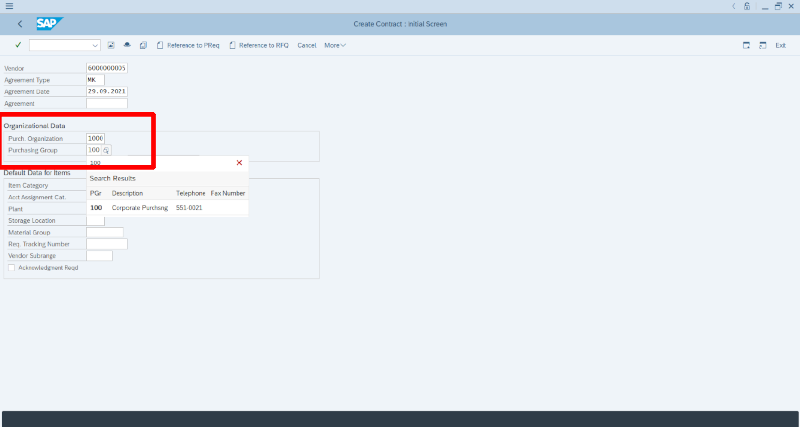
Step 5: Press Enter. You will see the header data screen shown below.
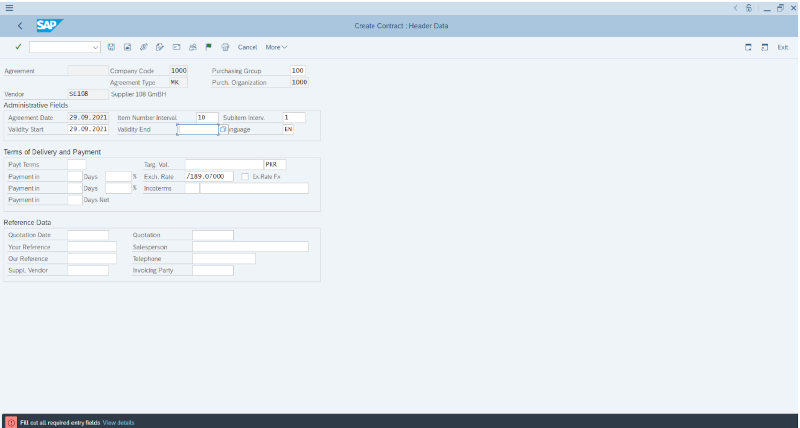
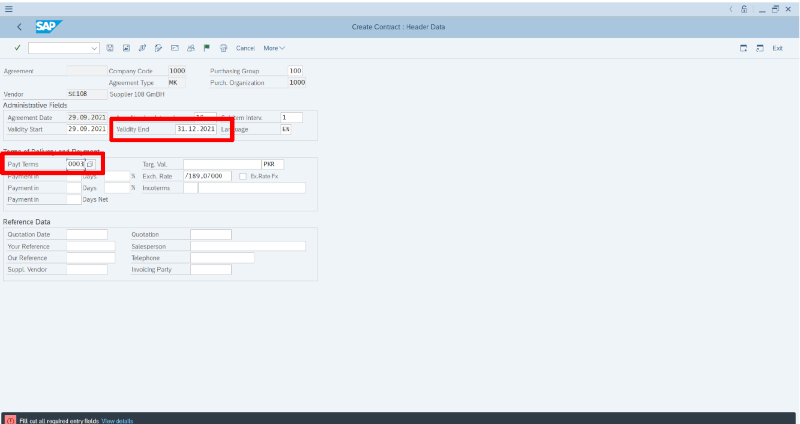
Step 6: Fill in all the required entry fields on this screen.
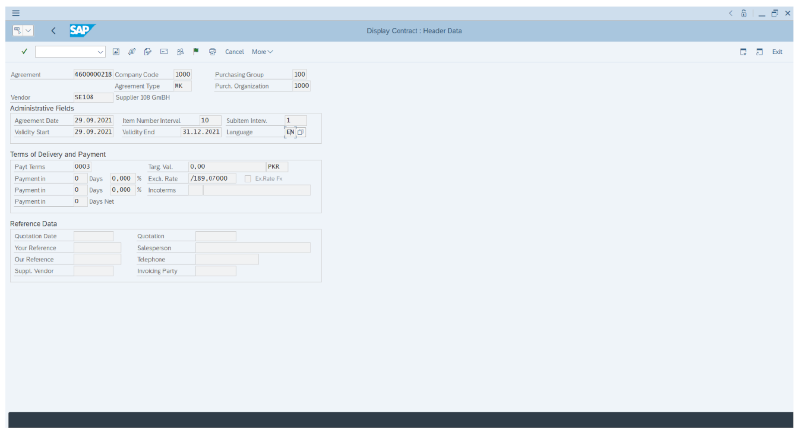
Validity End: It is the expiry date of the contract. The buyer will be responsible to purchase all the agreed quantities on/before this date.
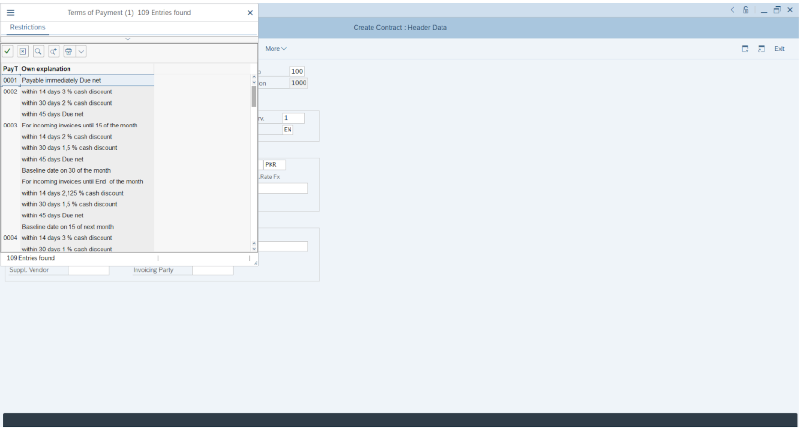
Payment Terms: The payment term is the agreed term decided between both parties. The buyer is responsible to release the payment of delivered material as per the agreed payment terms mentioned in the contract.
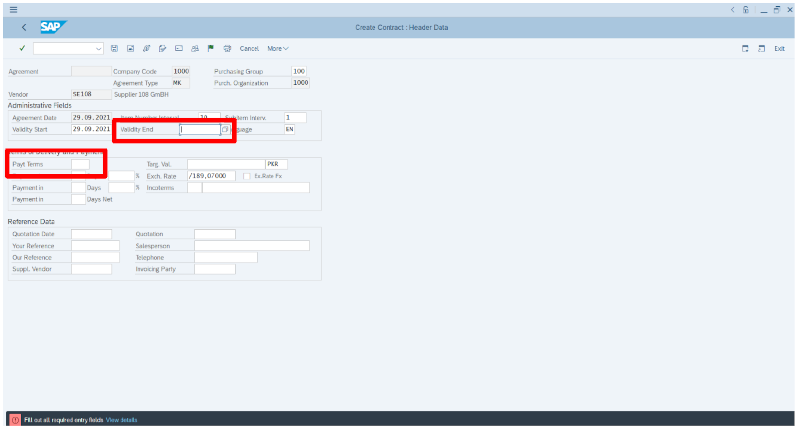
Select and enter the agreed payment term and with the vendor. In the below screen, you can see the list of payment terms in SAP.
Enter the contract expiry date or validity end date of the contract.
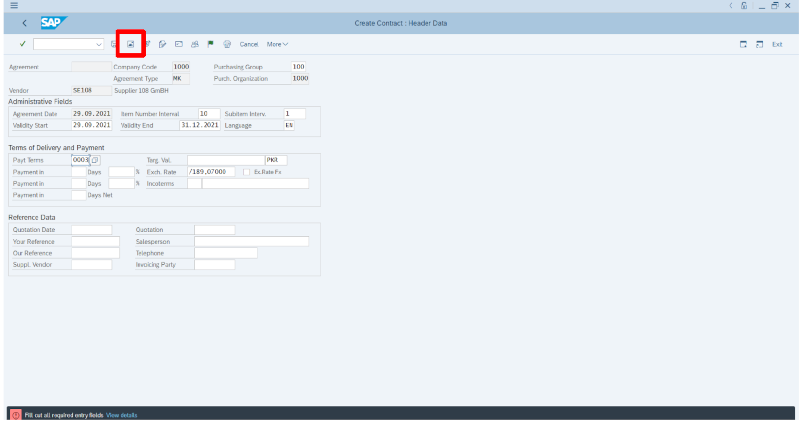
Step 7: After entering all the required data on the initial screen, press Enter or click on the overview icon or press F5.
Step 8: The next screen will be the item overview. In this window, item-level information will be provided.
- Material Code and Description
- Targeted Quantity
- Get Price
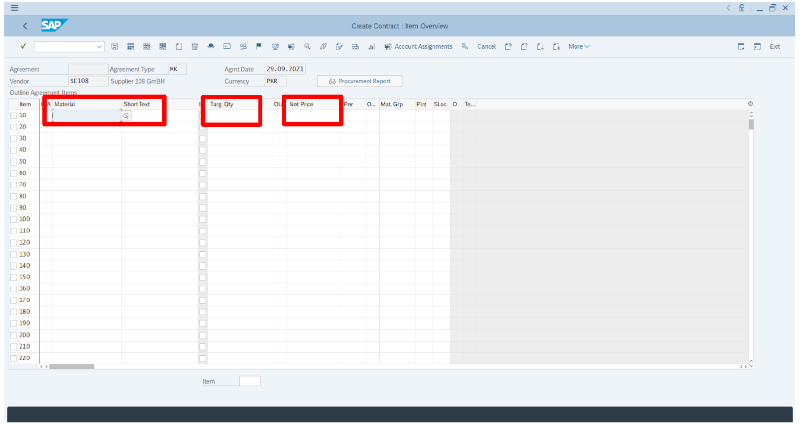
Now you can enter the material code, targeted quantity, and net price.
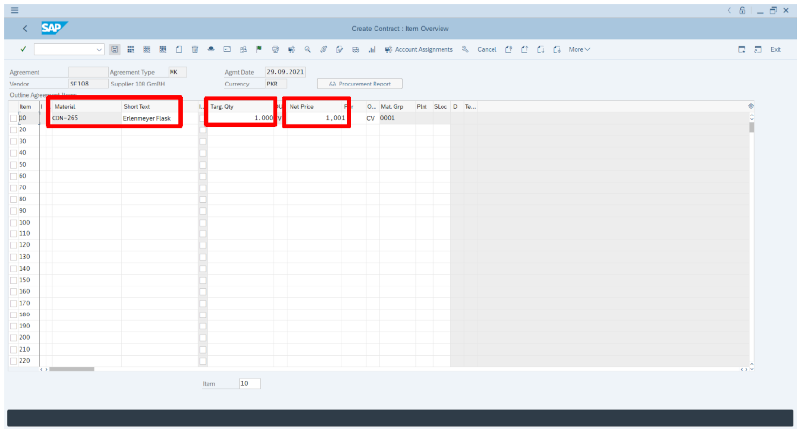
Step 9: Verify the data and save the agreement by click on the SAVE icon.
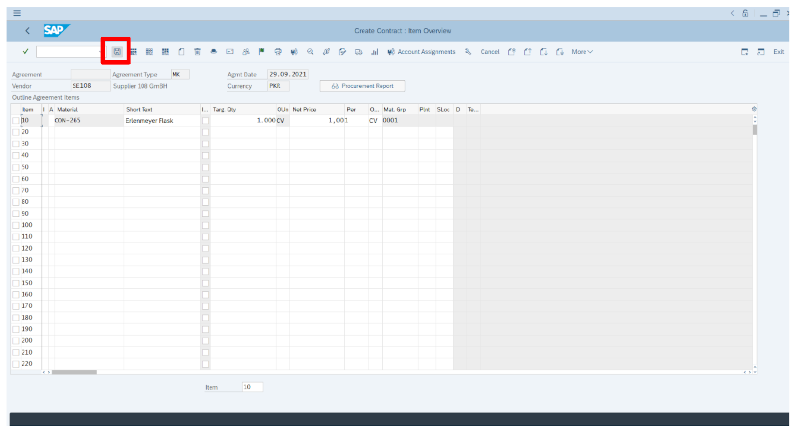
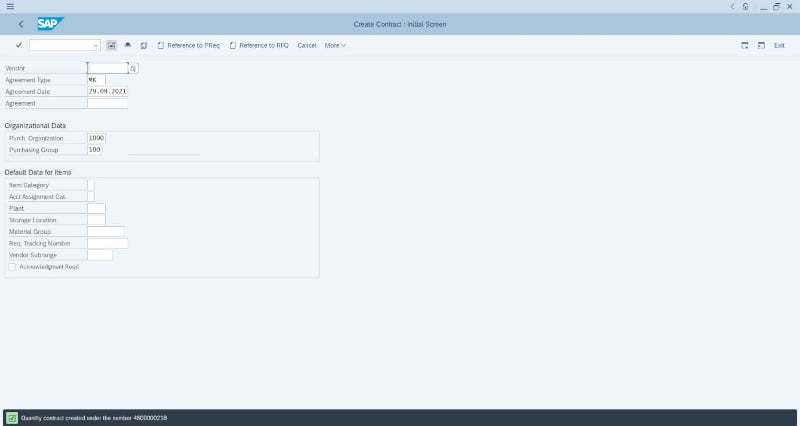
The outline agreement will be saved and a new number will be generated. You can see the number at the bottom of the SAP screen. Copy the outline agreement number.
How to view an outline agreement
To view an outline agreement, go to the T-Code ME33K and enter the agreement number.
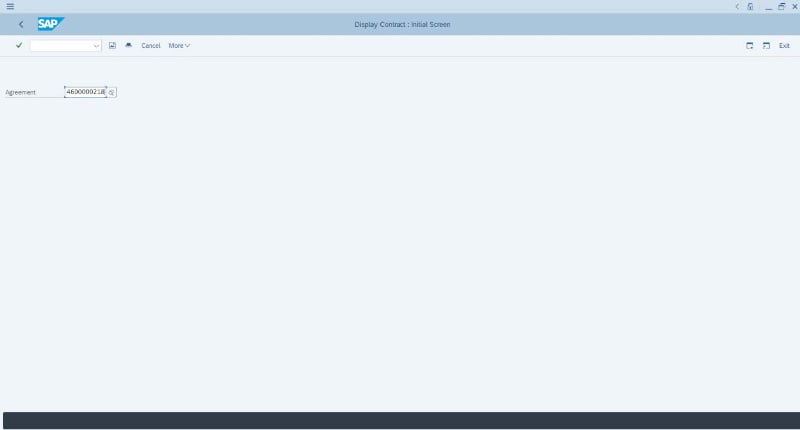
Press Enter or click on the overview icon.
![]()
The contract main screen will be displayed. Here, you can see the item detail, quantity, and net price.
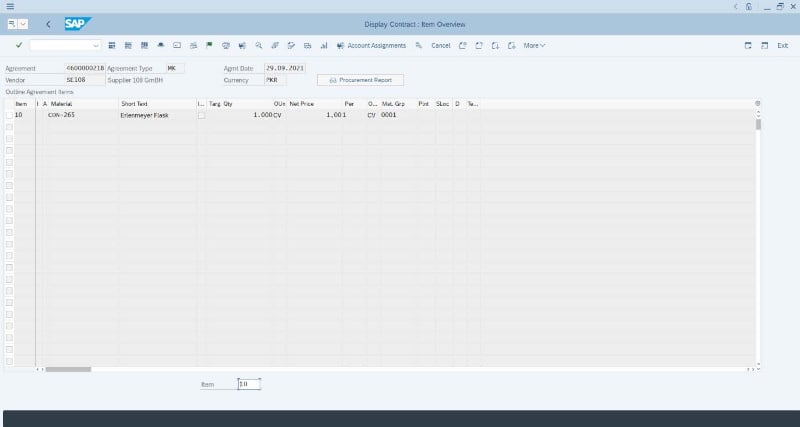
Click on the header details icon or press F6 to view the contract validity, payment terms, and other details.
![]()
You can also get the pdf copy of the contract by using the T-Code ME9K.
Learn More
Want to learn more about Outline Agreements in SAP and earn your certification? Be sure to check out our SAP Outline Agreements Course for hands-on training, simulated as if you were logged into an actual SAP system!
Tags:
SAPDec 2, 2021


-1.png)


